
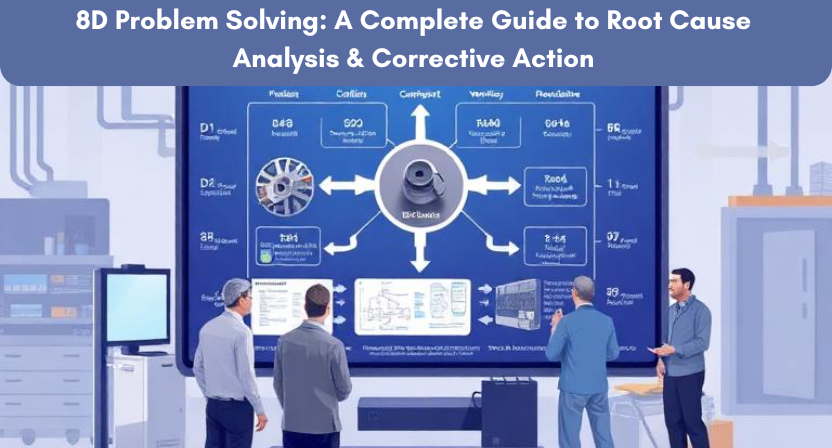
Quality problems can cost a business more than money. A recurring defect can delay production, increase rework, create customer complaints, and affect a company’s reputation. Fixing the defective product may solve the immediate issue, but it does not always stop the same problem from appearing again. That is why many engineering and manufacturing teams use 8D problem solving.
The 8D method gives teams a clear structure for investigating a problem, controlling its impact, finding the root cause, taking corrective action, and preventing recurrence.
A well-written 8D report should not simply explain what went wrong. It should also show why the problem happened, why the existing controls did not stop it, and what the company changed to prevent a repeat occurrence.
What Is 8D Problem Solving?
8D stands for Eight Disciplines. It provides a step-by-step approach for solving serious or recurring quality problems. The method brings people from different functions together so they can investigate the issue from several perspectives.
A production engineer may understand the machine and process. A quality engineer may have access to inspection data and customer complaints. A design engineer may understand the product specification. Maintenance staff may know about equipment history. When these people work together, they can often find causes that one department might overlook.
The main purpose of 8D is simple: solve the problem at its source instead of repeatedly fixing the symptoms.
For example, imagine that a machined component reaches a customer with an incorrect hole diameter. Replacing the defective parts protects the customer, but the replacement does not explain why the defect occurred. The investigation may reveal a worn cutting tool, an incorrect machine setting, a weak inspection method, or a missing process control. An effective 8D problem solving process helps the team investigate each possibility before selecting the root cause.
Why Is the 8D Method Important?
Many quality problems look simple when someone first notices them. The visible defect may take only a few minutes to describe, yet the reason behind it can involve several process failures.
Consider a production line that repeatedly produces parts with an incorrect dimension. An operator may adjust the machine and continue production. The parts may meet the specification for a short period, but the same defect can return later.
A deeper investigation may reveal that the cutting tool wears after a certain number of cycles. Perhaps the process does not define a replacement limit. Maybe operators rely on personal experience to decide when to change the tool. In that situation, adjusting the machine fixes the symptom, but it does not remove the underlying weakness.
The 8D method helps teams move from temporary fixes to permanent solutions. It also encourages companies to learn from problems instead of treating every complaint as an isolated event.
D1: Form the Problem-Solving Team
The first discipline focuses on people. A company should create a team with the technical knowledge and authority required to investigate the problem.
The team may include quality engineers, production engineers, design engineers, maintenance staff, purchasing personnel, supplier quality specialists, or customer support representatives. The right combination depends on the nature of the problem.
A strong team does more than attend meetings. Each member should bring useful information and help test possible causes. For example, a design engineer can review product specifications while a manufacturing engineer studies the production process. Quality personnel can examine inspection data, while maintenance staff can review machine history.
Cross-functional teamwork makes the investigation more complete and reduces the risk of making decisions based on assumptions.
D2: Define the Problem Clearly
A clear problem statement gives the team a strong starting point. Avoid statements such as “the product has a quality issue” because they do not provide enough information for a detailed investigation.
Instead, describe the problem with measurable facts. For example, the report could state that 12 out of 500 components produced during a specific production period had a bore diameter above the specified tolerance.
A useful problem statement should explain what happened, where it happened, when it happened, how many parts were affected, and which requirement the product failed to meet.
Numbers make the problem easier to understand. Production quantities, defect percentages, batch numbers, dimensions, dates, and customer complaint details can all help the team identify patterns.
When the team defines the problem accurately at the beginning, it becomes easier to focus the investigation and avoid unnecessary assumptions.
D3: Take Immediate Containment Action
The third discipline focuses on protecting the customer while the investigation continues.
Suppose a company discovers that one production batch may contain defective parts. The quality team might isolate the affected batch, inspect finished inventory, check work-in-progress material, stop shipments, or increase inspection until the team understands the issue.
These actions provide immediate protection, but they do not solve the root problem.
For instance, inspecting every component before shipment can stop defective parts from reaching the customer. However, the inspection process does not explain why the defect appeared in the first place. The company still needs to investigate the production process and eliminate the cause.
A strong 8D report clearly separates containment from corrective action. Containment reduces the immediate risk, while corrective action removes the source of the problem.
D4: Identify and Verify the Root Cause
D4 often requires the most detailed analysis because the team must determine why the problem happened.
The first suspected cause is not always the true root cause. Consider a shaft with an oversized diameter. The team may notice that the cutting tool has become worn. That observation provides a useful clue, but the investigation should continue.
Why did the tool remain in service after reaching the end of its useful life? Did the process define a tool-life limit? Did someone inspect the tool regularly? Did the work instruction provide replacement criteria? Did the operator receive enough information to make the correct decision?
Techniques such as the 5 Whys, fishbone diagrams, Pareto analysis, process mapping, and data analysis can help the team explore these questions.
The team should also verify the suspected cause instead of accepting it immediately. If the team controls the suspected cause and the defect disappears, that result provides stronger evidence. Historical production data, inspection results, machine records, and controlled trials can provide additional support.
A good root cause explains the problem with evidence. It should not simply sound reasonable.
D5: Develop a Permanent Corrective Action
Once the team confirms the root cause, the next step involves developing a corrective action that directly addresses it.
Suppose the investigation reveals that operators replace a cutting tool based on personal judgement because the company has never defined a tool-life limit. A weak corrective action might involve sending another reminder to operators. A stronger solution would establish a clear replacement limit, add tool-life tracking, update the work instruction, and define the inspection or replacement process.
Good corrective action reduces dependence on memory and guesswork. It strengthens the process so that employees can follow a clear and consistent method.
The best action does not merely react to the defect. It changes the conditions that allowed the defect to occur.
D6: Implement and Verify the Corrective Action
After selecting a corrective action, the team must put it into practice and check whether it works.
Completing the action does not automatically prove its effectiveness. The company should collect evidence and compare the results with previous performance.
For example, a team that changes a machine setting may monitor several production runs after the change. Another team may introduce a new inspection method and compare defect detection results before and after the improvement.
Depending on the problem, the verification process may include trial production, dimensional inspection, process capability studies, defect-rate analysis, customer feedback, or increased monitoring for a specific period.
The key question remains straightforward: Did the corrective action actually eliminate the problem?
A strong 8D report provides evidence rather than simply stating that the action has been completed.
D7: Prevent Recurrence
D7 asks the team to think beyond the original incident.
After solving one problem, could the same weakness exist on another machine? Could another product experience the same issue? Does another supplier follow a similar process? Did the problem expose a weakness in the company’s procedures, control plan, or inspection system?
The team can use the answers to strengthen the wider quality system. Possible improvements may include updating work instructions, revising PFMEA documents, improving control plans, modifying inspection methods, reviewing supplier controls, updating engineering drawings, or introducing mistake-proofing.
This step gives the 8D process a broader purpose. Instead of solving only one customer complaint, the company uses the experience to reduce the chance of similar problems across the business.
D8: Recognize the Team and Close the 8D
Once the team has implemented and verified the corrective action, it can close the 8D.
Before closure, the team should confirm that the problem has remained under control and that the required documentation contains the important findings, actions, and verification results.
The organization should also recognize the people who contributed to the investigation. Quality problems often require cooperation between several departments, and that teamwork deserves recognition.
Most importantly, the final report should capture useful lessons that other teams can apply in the future.
A Simple Example of 8D Problem Solving
Imagine a manufacturer producing metal housings for industrial equipment. A customer reports that several housings cannot be assembled because the mounting holes do not align correctly.
The quality team forms a cross-functional group and examines the affected parts. The investigation shows that the defective components came from one production batch. The team immediately isolates the remaining inventory and inspects the parts before shipping any further material.
Next, the team reviews the manufacturing process. Engineers discover that a locating pin in the fixture has worn down. At first, the worn pin appears to be the root cause.
The investigation continues, however, and uncovers another problem. The company has no defined inspection or replacement interval for that fixture. The process therefore allows the fixture to remain in service even after the locating pin has worn beyond an acceptable level.
The team replaces the worn component and introduces a fixture inspection schedule. It also defines clear replacement limits and updates the relevant work instructions.
After implementation, the company monitors production and confirms that the alignment problem no longer occurs. The team then reviews similar fixtures to see whether they have the same control gap.
This example shows the real value of 8D problem solving. Replacing the worn locating pin would fix the immediate issue. Improving the fixture-control process helps prevent the same failure from appearing again.
8D vs 5 Whys: What Is the Difference?
People often compare 8D with the 5 Whys because both methods support root cause analysis. However, they serve different purposes.
The 5 Whys focuses mainly on asking why a problem happened and tracing the issue toward an underlying cause. The 8D process covers a much wider area, including team formation, problem definition, containment, root cause analysis, corrective action, verification, prevention, and closure.
For that reason, a company can use the 5 Whys as one part of an 8D investigation, especially during D4.
In simple terms, the 5 Whys helps answer “Why did this happen?”, while 8D provides a broader structure for answering “How do we solve this problem and prevent it from returning?”
Common Mistakes in 8D Reports
One common mistake involves treating containment as the final solution. A company may sort defective parts or inspect every unit, but these actions only control the immediate risk. They do not remove the cause.
Another common problem occurs when teams stop at “operator error.” An operator may have made the final mistake, but that does not necessarily explain why the mistake reached the customer. The team should ask whether the instruction was clear, whether the process encouraged the error, whether training covered the task properly, and whether the company could add an error-proofing control.
Some teams also choose corrective actions that sound useful but lack measurable results. For example, telling employees to “be more careful” does not provide a reliable method for preventing recurrence.
Finally, teams sometimes close an 8D as soon as they complete an action. The better approach is to wait until the company has enough evidence to demonstrate that the action works consistently.
A Unique Way to Strengthen an 8D Investigation
There is one additional question that can make an 8D investigation much stronger:
What existing control should have caught this problem before the customer did?
This question creates another layer of analysis. It shifts the focus from the physical defect to the effectiveness of the company’s quality controls.
Suppose a dimensional defect passed through an inspection stage that should have detected it. The production process may have caused the defect, but the inspection process also failed to stop it. The team therefore needs to investigate both sides.
Perhaps the measuring equipment lacked calibration. Maybe the inspection frequency was too low. The sampling plan might not have covered the affected condition. Another possibility involves an unclear drawing requirement.
At Qaxles Technologies, we call this a Control Gap Check. The idea is simple: after finding the physical root cause, ask which existing control should have prevented or detected the problem.
This small addition can reveal weaknesses that a traditional root cause analysis may overlook. More importantly, it helps companies improve both the process that creates the product and the controls that protect the customer.
When Should You Use the 8D Method?
Companies do not need to use 8D for every minor issue. A simple internal problem may only require a quick correction or a 5 Whys analysis.
The 8D method becomes more valuable when a problem affects customers, continues to repeat, creates significant cost, disrupts production, involves several departments, or requires detailed root cause analysis.
The goal is not to create more paperwork. Instead, the goal is to apply enough structure to solve important problems properly.
Benefits of 8D Problem Solving
A strong 8D problem solving process can help organizations reduce recurring defects, lower scrap and rework costs, improve customer satisfaction, and strengthen corrective actions.
It can also improve communication between departments because the investigation brings different teams together around one clearly defined problem.
Over time, companies can use lessons from multiple 8D investigations to identify broader weaknesses in design, manufacturing, inspection, maintenance, supplier management, and process control.
That makes 8D more than a complaint-handling tool. It can become part of a company’s continuous improvement culture.
Conclusion
8D problem solving gives engineering and manufacturing teams a structured way to move from a visible defect to a permanent solution. The method starts by bringing the right people together, defining the problem clearly, protecting the customer, identifying the root cause, and developing corrective action. The later stages focus on verifying the solution and preventing similar failures.
The most effective 8D investigations go one step further. They do not only ask why the defect occurred. They also ask why the existing quality system did not prevent or detect the defect.
That additional thinking can turn a routine corrective-action report into a valuable improvement exercise.
At Qaxles Technologies, we combine engineering knowledge, digital tools, and structured problem-solving methods to help businesses address technical and quality challenges more effectively. Our approach focuses not only on fixing an immediate issue but also on understanding the process behind it and improving the system for the future.
Ultimately, the success of an 8D should not be measured by how quickly a report gets closed. The real measure is whether the organization solves the problem, strengthens its process, and makes the same failure less likely to happen again.