
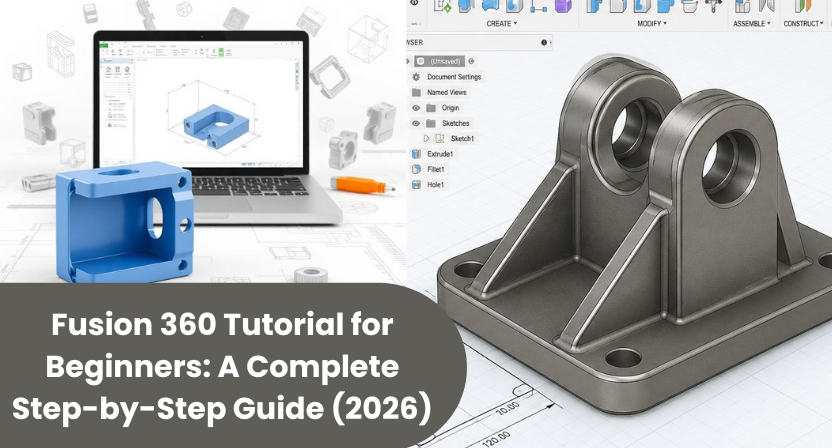
If you’re looking for a Fusion 360 tutorial that explains the software in a practical way instead of overwhelming you with technical jargon, you’re in the right place.
Many beginners install Fusion 360, open the workspace, and immediately wonder where to start. With dozens of tools, multiple workspaces, and hundreds of commands, the interface can seem intimidating. The good news is that you don’t need to master every feature to begin designing professional-quality 3D models.
In this fusion 360 tutorial, you’ll learn the fundamentals of Fusion 360 step by step. Instead of simply listing tools, we’ll follow the same workflow used by mechanical engineers and product designers from creating your first sketch to generating a finished 3D model.
What Is Fusion 360?
Fusion 360 is a cloud-based CAD, CAM, CAE, and PCB design platform developed by Autodesk. Unlike traditional CAD software that focuses only on modeling, Fusion 360 combines product design, simulation, rendering, manufacturing, and collaboration in one environment.
Whether you’re designing machine components, consumer products, sheet metal parts, enclosures, or prototypes for 3D printing, Fusion 360 provides all the essential tools in one application.
For beginners, one of its biggest advantages is parametric modeling. Every design step is recorded in a timeline, allowing you to modify dimensions or features later without recreating the entire model.
Understanding the Fusion 360 Interface
Before creating your first design, spend a few minutes becoming familiar with the workspace.
The default Design workspace contains several important areas:
- Toolbar – Houses commands for Sketch, Solid, Surface, Sheet Metal, Mesh, and Utilities.
- Browser Panel – Displays components, bodies, sketches, construction planes, and folders.
- Canvas – The area where you create and edit models.
- Timeline – Records every feature added to your design.
- Navigation Cube – Helps rotate and view your model from different angles.
One common beginner mistake is ignoring the timeline. In Fusion 360, the timeline is just as important as the model itself because it stores the complete design history.
Step 1: Create Your First Project
Start by creating a new project in the Data Panel.
Organizing projects from the beginning saves time later, especially if you’re working on multiple client or engineering projects.
For example:
- Mechanical Parts
- Product Designs
- Practice Models
- Sheet Metal Projects
Keeping related files together makes future revisions much easier.
Step 2: Start a New Design
Click New Design.
Fusion 360 automatically opens an empty workspace.
Before sketching anything, save your file with a meaningful name.
Instead of:
Design1
Use names like:
Motor Mount Bracket
Pump Housing
Bearing Support Plate
Clear file names improve project management, particularly when several versions exist.
Step 3: Create Your First Sketch
Every solid model starts with a sketch.
Choose Create Sketch and select one of the origin planes:
- XY Plane
- XZ Plane
- YZ Plane
For beginners, the XY plane is usually the easiest starting point.
The Sketch toolbar includes tools such as:
- Line
- Rectangle
- Circle
- Arc
- Polygon
- Spline
- Slot
Try drawing a rectangle measuring 120 mm × 80 mm.
Next, add dimensions using the Dimension tool.
Adding dimensions transforms rough geometry into an accurate engineering sketch.
Step 4: Apply Sketch Constraints
Many new users skip constraints, which leads to unstable sketches that behave unpredictably during editing.
Fusion 360 automatically applies several constraints while sketching, including:
- Horizontal
- Vertical
- Coincident
- Tangent
- Parallel
- Perpendicular
Watch the sketch status.
A fully constrained sketch turns black.
Blue sketch lines indicate under-constrained geometry that can still move.
Getting into the habit of fully constraining sketches makes future modifications much easier.
Step 5: Convert the Sketch into a 3D Model
Once your sketch is complete, click Finish Sketch.
Choose Extrude.
Select the sketch profile.
Enter an extrusion distance.
For example:
25 mm
Click OK.
Congratulations, you’ve just created your first solid body.
This simple workflow forms the foundation of almost every mechanical design created in Fusion 360.
Step 6: Modify the Model
Now it’s time to improve the part.
Fusion 360 provides several modification tools:
Fillet
Rounds sharp edges.
Useful for reducing stress concentrations and improving appearance.
Chamfer
Creates angled edges.
Commonly used for machining and assembly.
Shell
Hollows out solid models.
Ideal for plastic housings and electronic enclosures.
Draft
Adds tapered surfaces required for injection molding.
Instead of creating complicated shapes immediately, practice using these tools on simple models until you’re comfortable with each one.
Step 7: Create Holes
Mechanical components often require holes for fasteners.
Rather than sketching circles and extruding them, use the dedicated Hole command.
It allows you to define:
- Hole diameter
- Depth
- Counterbore
- Countersink
- Thread options
Using the Hole feature makes designs cleaner and easier to modify later.
Step 8: Learn Pattern Tools
Imagine creating twenty identical holes manually.
Instead, use Fusion 360’s pattern features.
Popular options include:
Rectangular Pattern
Duplicates features in rows and columns.
Circular Pattern
Repeats features around an axis.
Mirror
Copies geometry across a selected plane.
These tools dramatically reduce modeling time.
Step 9: Assemble Components
Real engineering products consist of multiple parts rather than one solid body.
Fusion 360 allows you to create assemblies using Components and Joints.
For example, a gearbox may include:
- Housing
- Shaft
- Bearings
- Cover Plate
- Fasteners
Using Components instead of separate bodies improves organization and enables realistic motion studies.
Step 10: Generate Drawings
Once your design is complete, manufacturing requires technical drawings.
Fusion 360 can automatically generate:
- Front view
- Side view
- Top view
- Section views
- Detail views
- Dimensions
- Notes
Always verify dimensions before sharing drawings with production teams.
Common Beginner Mistakes
Most beginners encounter similar challenges.
Sketching Without Dimensions
Undimensioned sketches become difficult to edit later.
Ignoring Constraints
Loose geometry often causes unexpected model failures.
Editing Bodies Instead of Features
Whenever possible, modify the original feature in the timeline rather than deleting and recreating geometry.
Poor File Organization
Meaningful project names and organized folders save significant time as projects grow.
Designing Without Planning
Before sketching, think about the manufacturing process. Parts intended for CNC machining, sheet metal fabrication, or 3D printing often require different design approaches.
Tips to Learn Fusion 360 Faster
Learning CAD is easier when you practice consistently.
Here are a few habits that produce steady improvement:
- Spend at least 30 minutes practicing every day.
- Recreate simple objects around your workspace, such as a phone stand, wrench, or water bottle cap.
- Learn keyboard shortcuts to speed up your workflow.
- Study how experienced engineers build models instead of focusing only on the final result.
- Review your timeline regularly to understand how each feature contributes to the finished design.
The goal isn’t to memorize every command but to understand the logic behind the design process.
Is Fusion 360 Suitable for Beginners?
Absolutely.
Although the interface contains many advanced tools, beginners only need to learn a small set of core features to become productive.
Once you’re comfortable with sketching, extruding, modifying features, and creating assemblies, you can gradually explore simulation, rendering, sheet metal design, CAM, and generative design.
This gradual learning approach prevents frustration and builds confidence with every project.
Conclusion
Learning CAD is a journey, and every experienced designer started with a simple sketch. This Fusion 360 tutorial has introduced the essential workflow you’ll use in almost every project: creating sketches, applying dimensions and constraints, converting them into 3D models, refining features, organizing components, and preparing drawings for manufacturing.
The best way to improve is through hands-on practice by using this fusion 360 tutorial. Choose a small everyday object, recreate it in Fusion 360, and then challenge yourself with something slightly more complex. Over time, you’ll begin to recognize design patterns, model more efficiently, and develop confidence using professional CAD tools.
Instead of trying to learn every command at once, focus on mastering the fundamentals. A strong understanding of the basics will make advanced features much easier to learn and will prepare you for real-world mechanical design, product development, and manufacturing projects.